Excuse me while I stray from the *twitter for beginners* course that my recent posts have been about. You can find it *here* or by clicking the 'Social Media' option above.
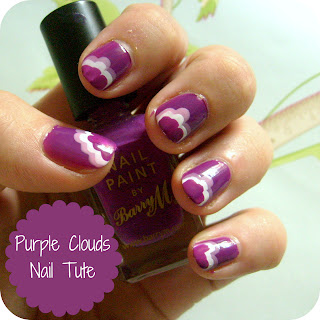
I've had a day off work today for a rather unglamourous reason, so I have been watching Peter Pan and working on this Purple Clouds nail tutorial. I think it would look super with dark blue, light blue and white.
Barry M is my favourite polish, they are only 2.99 a bottle and they come in the best range of colours, they go on thick and they last for days. I really can't see why I would spend an extra ten pounds on something I don't love as much.
I really love the way my camera picks up all the tiny hairs on my fingers. I clearly have Hobbit ancestors. I've painted a clear base coat and two careful coats of purple.
I've used light pink to make three lines, starting halfway up the nail. These don't have to be perfect, and don't worry if one coat seems very transparent against your darker background. Doesn't matter at all.
Start a little way further up and follow your previous lines to add the white. It helps to not have too much on the brush, and just use the corner.
Once the white is dry, you can blob on three purple blobs to the top of your nail. Follow the same pattern as the pink and white. You could also do another colour here if you wanted to get crazy. I'm just not that crazy.
Add a shiny top coat. You might need two to disguise the fact that you have 5 coats on the top part of your nail and 2 on the bottom, but after two coats of clear polish your nail surface will be smooth.
I'd love to see photos if this tutorial has inspired you! You can email me here.


those are super cute, thanks for sharing! :)
ReplyDelete